Last spring, my work sent out a very fancy invitation printed on 100% cotton paper. As we got the return cards in the mail, we lamented the waste of such nice paper into a recycling bin. One donated paper making kit + three dozen returned envelopes + three months procrastination: JPK and I totally made paper!
Materials you will need
- A large bowl
- Paper
- Water
- A mixer or food processor
- Two wooden frames 8"-12" with an attached mesh screen (you can this with a stapler)
- A large Tub (for instance the never used kitty litter box from that one time we almost had a cat)
- Cloth to spread paper out on and also to dab water (so two cloths)
Step One: Tear it up!
This step was pretty easy, as tearing up bits of paper is something most 5 year olds enjoy. I know I sure did! There was a back and forth about exactly how small the bit should be.
Me: Pretty small

JPK: Like this?
Me: I mean, it could be smaller
JPK: Like this?
Me: I think that's actually bigger, but I'm not judging. I'm just happy you are here.
The instructions said "a few handfuls" of paper for each batch. I took this to mean: it doesn't matter, tear up some paper and move on to step 2.
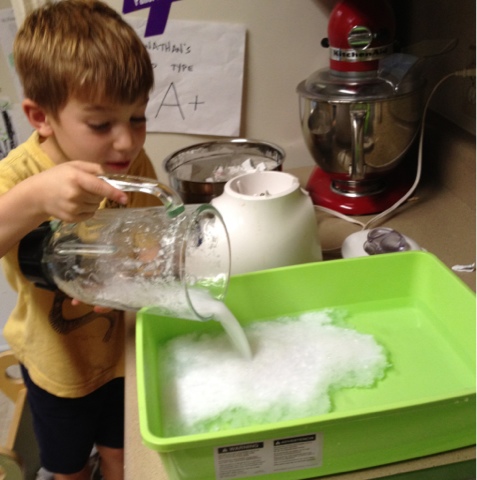
Step Two: Get Mixy

We took our shredded paper and filled the blender up half way. We added a few handfuls of paper and blended them up. This created a delightful mush. Then we poured the mush in batches into our tub (filled 3/4 full of plain water.) Our mush mixed with the water, making... watery mush.
Step 3: The Silver Screen (not actually silver)
The process here is pretty simple:
- Dipped mesh screen into the water getting good and mushy.
- Remove from tub and drained out water.
- Place mush side down on a clean cloth
- Dab other cloth on the back to remove excess moisture
- Pull up your screen and feel like a maker

It took about 3 hours for these to dry. It was also November in the shade. Our paper:

You can also iron your paper. However, I don't own an iron. JPK really enjoyed this and I was happy to successfully perform a hands-on craft type task.
No comments:
Post a Comment